

A Little Work Gives Delicious Results
A great way to save that fresh-from-the-tree fruit for use throughout the year. I love to chill a jar, and when you feel like something delicious and sweet, serve. Another family favorite is a delicious fresh peach cobbler.
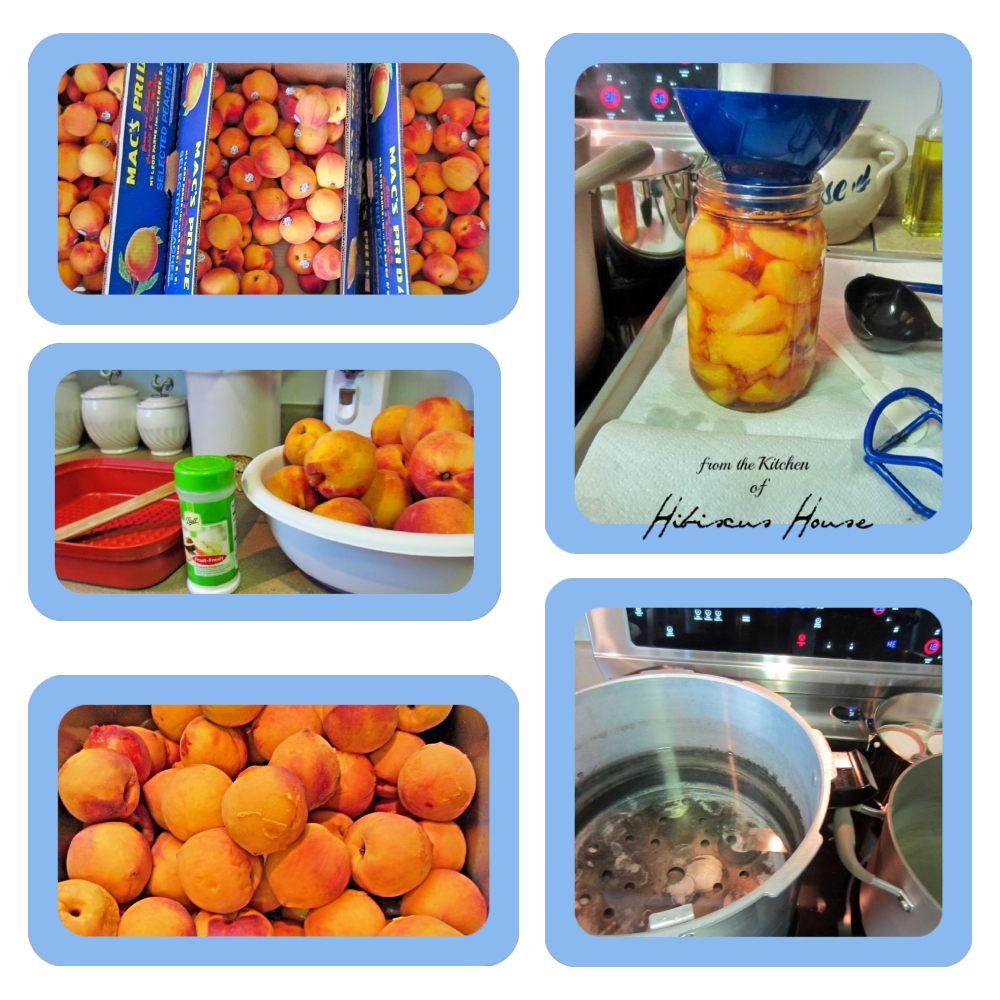
Let's Home Can/Preserve Some Delicious Fresh Peaches!
You can cut in half with freestone- cling-free peaches or cut into slices for preserving. The peaches that cling to the seed/pit are delicious as well, but are a little harder to remove for processing.
Instructions and Tips
- Fill a large pot that has a lid with water half full to use on the stovetop. Large enough to have 1 1/2 to 2 inches of water covering the jars you will be canning. Or you can use an electric water bath canner such as the ones shown in the pictures below. **Note, remember the weight of the filled jars will make the water higher, so keep in mind and have a pot ot hot water handy to add to the water bath if needed.
- Place a rack in the bottom of the pot used for the water bath to prevent the canning jars from breaking. You can even put a dish towel in the bottom of the pot to prevent the jars from bursting, if you don't have a rack.
- Bring the water to a boil and sterilize your jars. * I use an Electric Ball FreshTech Water Bath, but I also have a large stovetop pot I can use as well. Both can be used to sterilize the jars.
- Carefully remove jars and place them in a warm oven at 275 degrees F to keep them warm until you fill them.
Preparing The Peaches For Canning
- Cut an X on the bottom of the peaches, don't cut too deep, just enough for the skin to loosen.
- Place the peaches carefully into a pot of boiling water for no longer than one minute. This makes them easier to peel.
- Carefully take them out of the boiling water & immediately put them into cold water to cool
- Peel, cut in half, or into slices
- Remove the pit, and scrape the center to get the red out. I use a grapefruit spoon, and it works great for that.
- Make your syrup, which will be added to the jars covering the peaches for canning. *Medium Syrup Recipe below.*
- As you peel the peaches, place them into a container of prepared water with Fruit Fresh to prevent them from turning brown. *note** you may use lemon juice in water if you have no Fruit Fresh.**
- Cut the peaches in half or cut into slices, whichever you prefer for canning
- You can hot pack by heating peaches in syrup, or cold pack the peaches into the jars. Place peach halves, cut side down, on top of each other, packing as many as you can. Leave 1/2" headspace at the top of each jar.
Be sure to remove the air bubbles. Use something plastic, such as a bubble popper in canning tools or a plastic knife, to do this, moving the peaches easily around in the jar.
Fill Your Sterilized Jars

This is a hot job! Have all tools available and ready for use.
- Have oven gloves or mitts, or hot pads available for safety. SAFETY first always.
- Have something on your counter to protect while filling the jars. It can be a very sticky hot job! I use a baking sheet lined with paper towels to absorb some of the mess.
- Find a spot in your kitchen away from drafts. Heat-resistant or cover to protect the surface. (Kitchen towels will work in a pinch.)
- After processing, carefully place filled jars onto the spot you've chosen, free of drafts.
- Cover the jars with a light tea towel once they're set into place. The hot jars should seal.
- Check the jars 24 hours later. If they didn't seal and the lid pops up in the center when pressed gently, you should place them in the fridge or put them into freezer containers and freeze them to use later.


Ball FreshTECH Electric Water Bath Canner Amazon
Like my model, which I purchased a few years ago! Back it has a nob for temp control
Not as many features as the newer model, but if you're an experienced canner, you'll do fine with this one. I've enjoyed mine; in fact, I used it yesterday to water-bath some fresh tomatoes.
It is something I never thought I would need to buy, but it does cut the processing down because it holds so many jars. I also like the fact that it's not as hot on you because you're not getting burned by hot steam and hot bubbling water!
You don't own one, that's okay, you can certainly use a large pot with a rack in the bottom. The rack will prevent the jars from the direct heat, which can cause them to break.
Whatever pot you use, don't skip the water bath step for safety.
NEWER MODEL

Amazon also has a newer model that looks pretty terrific!
Who Loves Peaches?
Peaches make great cobblers, pies, fruit salads, and many recipe additions
Nothing beats cold-sliced peaches in syrup!
Enjoy your preserving for many months to come!
The fresh taste of delicious fruit and produce can't be matched!

No comments:
Post a Comment